At present, biometric technology is very useful & important because they are very effective, precise & provides more safety. Present smartphones comprise a fingerprint sensor to validate the consumer while some high-end smartphones provide extra Biometric Sensors like facial recognition & iris scanners. This technology is mainly used in government & private sectors to confirm an identity of a person. Because every person has some unique features like both behavioral & physiological characteristics but that is not the same for everybody also. So biometric sensors play a key role in detecting a person’s physiological characteristics. This article discusses an overview of s biometric sensor system – working with applications.
What is Biometric Sensor?
The definition of a biometric sensor is an identification & authentication device that uses automated methods of recognizing or verifying the characteristics, of a living person depending upon physical attributes like facial images, fingerprints, voice recognition & Iris. So, these sensors collect measurable biometric signals from a human being then they can be used in combination with the algorithms of biometric recognition to perform the identification of an automated person.
Working Principle of Biometric Sensor
The biometric sensor working principle is to change the biometric attribute of an individual person into electrical signals. Generally, these sensors are semiconductor devices used to process the physical characteristics of an individual with complex algorithms. So, a person’s physical characteristics mainly include iris, fingerprint, face, etc. These characteristics are simply scanned with a Biometric Sensor & changed into a digital image with an ADC (Analog to Digital Converter). The person’s digital information is stored within a memory & is utilized to authenticate or verify a person’s identity.
Biometric Sensor Types
Based on the technology used to capture images, Biometric sensors are further classified into different kinds.
Face Recognition
A facial recognition biosensor uses different facial nodal points to evaluate the captured image to the system’s image which includes different variables like length or width of the nose, depth of eye socket, shapes of the cheekbone, etc. These sensors are widely used in security systems by using biometric methods like facial recognition technology within smartphones, home alarm systems, laptops, etc.
Facial recognition technology is used in Facebook applications in smartphones to tag the operators within a photograph, personal marketing social networking & financial security-based applications. This fingerprint recognition simply captures an individual’s fingerprint image & after that, it records its different features such as arches, patterns in whorls, outline loops, or edges & the details of the print within biometric fingerprint scanners.
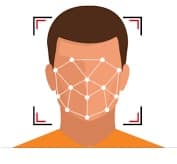
Face Recognition Sensor
Fingerprint biometric image capturing may be attained with optical sensors with CMOS or CCD image sensors. Fingerprint scanning is very stable & reliable. Different kinds of biometrics are utilized mainly for security within electronic door locks on buildings, attendance marking & movement over factory floors, bank ATMs including fingerprint authenticators, etc.
Voice Recognition
The human voice signal is extremely complex that utilizes speech technology & captures patterns of speech for evaluation which includes different behavioral & physiological patterns such as basic frequency, voice inflection, nasal tone, cadence, etc. In these types of sensors, different categories exist which mainly depend on methods utilized like fixed text method, text-dependent method, conversational methods & text-independent technique.
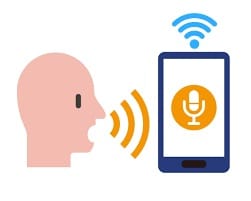
Voice Recognition Sensor
Iris Recognition
Iris recognition is an automated biometric identification technique that utilizes mathematical pattern-recognition methods on video images of irises of human eyes, whose complex patterns are stable, and unique & can be observed from some distance.
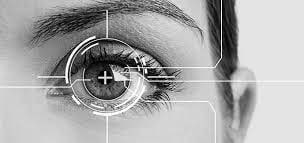
Iris Recognition Sensor
Iris Recognition plays a key role in recognizing individuals, particularly in sectors like border control & law enforcement, So the iris is an extremely strong biometric, very resistant to fake matches & a high search speed from large databases. This type of biometric system is a very strong & reliable method to recognize individuals accurately
Signature Recognition
In this biometric technique, the visual signature images are captured and checked with the stored signature in the system for different kinds of biometrics or parameters such as stroke order, the applied pressure, etc. Signature recognition works in two modes static and dynamic.
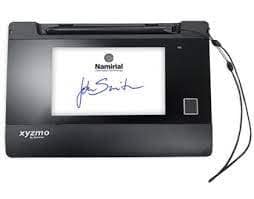
Signature Recognition
In static mode, the optical scanner, as well as the digital camera, is mainly used for capturing the signature of the customer on paper to check & store the shape & other parameters of the signature. In dynamic mode, a digitized tablet is utilized for capturing the signature of the consumer to attain a real-time image after that it is stored for unique identification.
Biometric Sensor Arduino
The biometric sensor interfacing with a microcontroller like Arduino is shown below. The required components of this project mainly include a fingerprint sensor, male header, Arduino Uno, LED, and tools like soldering iron and soldering wire.
The fingerprint sensors are available in different types like optical, capacitive, and ultrasonic. The biometric sensor used in this project is R307 optical type. This sensor simply captures your finger ridges and after that, it utilizes a particular algorithm to match it with stored data & displays the result. Usually, the fingerprint scanner functions with the help of optical rays. The optical fingerprint sensor will flash a clear light toward the finger. In addition, it captures the finger’s image digitally.
After that, it monitors the pattern of a finger and turns this finger pattern into logic 1 or 0 & creates this source code for that fingerprint. So this code is the recognition key of the fingerprint. Once it matches, then the access will be given to a system by the sensor.
R307 Fingerprint Sensor
This R307 fingerprint sensor mainly involves two processes one process is fingerprint enrollment whereas another process is fingerprint matching. So for this sensor, every module has to recognize the address.
R307 module includes an optical fingerprint sensor, DSP, fingerprint alignment algorithm, FLASH chips with high capacity & other hardware and software composition, constant performance, simple construction with fingerprint entry, fingerprint matching, image processing, search & template storage, etc.
R307 module includes a TTL UART interface and the user can simply store the fingerprint data within the module & can arrange it in 1:1 (or) 1: N mode to identify the person. This module can interface directly with 3v3 Microcontroller. So a MAX232 level converter is necessary for interfacing by PC. This module includes two interfaces TTL UART & USB2.0 where the USB2.0 interface is simply connected to the PC and the RS232 interface is a transistor-transistor logic level.
Pin Configuration
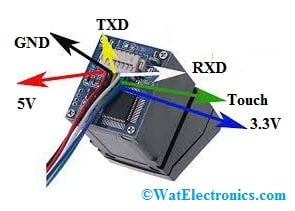
The R307 fingerprint sensor pin configuration is shown below which includes 6-pins, where each pin is discussed below.
R307 Fingerprint Sensor
- Pin1 (5V): This is a power input pin.
- Pin2 (GND): This is a GND pin.
- Pin3 (TXD): This is the output type, TTL logical level pin.
- Pin4 (RXD): This is the data input type, TTL logical level pin.
- Pin5 (Touch): This is the output type, finger detection signal.
- Pin6 (3.3V): This is the input type, finger detection power pin.
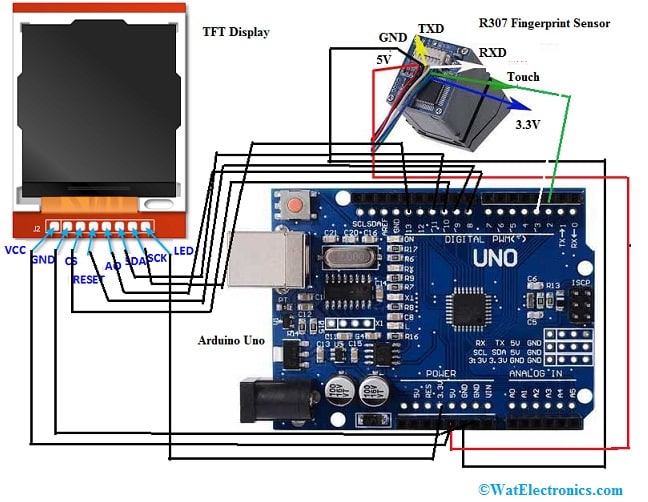
The required components of this interfacing mainly include Arduino Uno, R307, TFT display, Breadboard & Dupont cables.
Features & Specifications
The features and specifications of the R307 fingerprint sensor include the following.
- This sensor includes a chip algorithm & image collection.
- It is very easy to use and power consumption is less.
- Size is small, outstanding performance, and cost-effective.
- Simple application development and high capacity-based image processing.
- Voltage supply ranges from DC 4.2 to 6.0V.
- The typical working current is 50mA & peak current is 80mA.
- The input time of the fingerprint image is <0.3 seconds.
- The window area is 14×18 mm.
- The characteristic file is 256 bytes.
- The template file is 512 bytes.
- Storage capacity is 1000 pieces.
- The fake rate is less than0.001%.
- Refusal rate is <1.0%.
- Search time is <1.0 sec.
- The host interface is UART or USB1.1.
- UART communication baud rate is (9600xN) bps.
- The connections of R307 Interfacing with Arduino follow as;
Connections of Fingerprint Sensor:
- The sensor’s Black Wire is connected to the GND pin of Arduino.
- The Red Wire of the sensor is connected to the 5V pin of Arduino.
- The Green Wire of the sensor is connected to Digital Pin 2.
- The White Wire of the sensor is connected to Digital Pin 3.
Connections of Display:
- The Vcc pin of the display is connected to Arduino’s 5V pin.
- The GND pin of the display is connected to the GND pin of Arduino.
- The CS pin of the display is connected to Digital Pin 10 of Arduino.
- The RST pin of the display is connected to Digital Pin 9 of Arduino.
- The A0 pin of the display is connected to Digital Pin 8 of Arduino.
- The SDA pin of the display is connected to Digital Pin 11 of Arduino.
- The SCK pin of the display is connected to Digital Pin 13 of Arduino.
- The LED pin of the display is connected to the Arduino 3.3V pin.
Fingerprint Sensor Interfacing with Arduino Uno
Now for the fingerprint scanner & the display, we need to install the required libraries. For that, we have to download the library of Adafruit for fingerprint scanners i.e, the Adafruit GFX library. After that for the display, we need to download Sumotoy’s library from their official sites.
Once successfully downloaded, we need to add these two libraries to the system. So, we need to upload the code into the Arduino Uno board which is given below. So this Arduino code will request us to sign up for the fingerprint once the code is uploaded into the Arduino board. So by performing this, we can include as many fingerprints as we wish to add. Each fingerprint will include a separate ID for recognition.
Once the fingerprint is registered successfully to the fingerprint sensor, then upload the following code to the Arduino Uno to illustrate this procedure on display.
Code
#include <SPI.h>
#include <Adafruit_GFX.h>
#include <TFT_ILI9163C.h>
#include <Adafruit_Fingerprint.h>
#include <SoftwareSerial.h>
// Color definitions
#define BLACK 0x0000
#define BLUE 0x001F
#define RED 0xF800
#define GREEN 0x07E0
#define CYAN 0x07FF
#define MAGENTA 0xF81F
#define YELLOW 0xFFE0
#define WHITE 0xFFFF
#define __CS 10
#define __DC 9
static const uint8_t icon [] PROGMEM = {
0x0,0x0,0x0,0x0,0x0,0x0,0x0,0x0,
0x0,0x0,0x0,0x0,0x0,0x0,0x0,0x0,
0x0,0x0,0x0,0x0,0x0,0x0,0x0,0x0,
0x0,0x0,0x0,0x3f,0xc0,0x0,0x0,0x0,
0x0,0x0,0x3,0xff,0xf8,0x0,0x0,0x0,
0x0,0x0,0x7,0xff,0xfe,0x0,0x0,0x0,
0x0,0x0,0x1f,0xc0,0x7f,0x80,0x0,0x0,
0x0,0x0,0x3e,0x0,0x7,0xc0,0x0,0x0,
0x0,0x0,0x7c,0x0,0x3,0xe0,0x0,0x0,
0x0,0x0,0xfd,0xff,0x81,0xf0,0x0,0x0,
0x0,0x0,0xff,0xff,0xe0,0xf0,0x0,0x0,
0x0,0x1,0xff,0xff,0xf8,0x78,0x0,0x0,
0x0,0x1,0xff,0x80,0x7c,0x38,0x0,0x0,
0x0,0x3,0xfc,0x0,0xe,0x3c,0x0,0x0,
0x0,0x3,0xf0,0x0,0x7,0x1c,0x0,0x0,
0x0,0x7,0xc0,0x7f,0x83,0x8e,0x0,0x0,
0x0,0x7,0x83,0xff,0xe0,0xe,0x0,0x0,
0x0,0x7,0xf,0xff,0xf8,0xf,0x0,0x0,
0x0,0x6,0x1f,0x80,0xfc,0x7,0x0,0x0,
0x0,0x4,0x7e,0x0,0x3f,0x7,0x0,0x0,
0x0,0x0,0xf8,0x0,0xf,0x7,0x0,0x0,
0x0,0x0,0xf0,0x3e,0x7,0x87,0x0,0x0,
0x0,0x1,0xe1,0xff,0x83,0x83,0x80,0x0,
0x0,0x3,0xc3,0xff,0xc3,0xc3,0x80,0x0,
0x0,0x3,0xc7,0xc3,0xe1,0xc3,0x80,0x0,
0x0,0x3,0x8f,0x0,0xf1,0xe3,0x80,0x0,
0x0,0x7,0x1e,0x0,0x78,0xe3,0x80,0x0,
0x0,0x7,0x1e,0x3c,0x38,0xe3,0x80,0x0,
0x0,0x7,0x1c,0x7e,0x38,0xe3,0x80,0x0,
0x0,0xf,0x1c,0x7f,0x38,0xe3,0x80,0x0,
0x0,0xe,0x3c,0xf7,0x38,0x71,0x80,0x0,
0x0,0xe,0x38,0xe7,0x38,0x71,0xc0,0x0,
0x0,0xe,0x38,0xe7,0x38,0x71,0xc0,0x0,
0x0,0xe,0x38,0xe7,0x38,0x73,0xc0,0x0,
0x0,0xe,0x38,0xe3,0x98,0xe3,0xc0,0x0,
0x0,0xe,0x38,0xe3,0xb8,0xe3,0x80,0x0,
0x0,0x0,0x38,0xe3,0xf8,0xe3,0x80,0x0,
0x0,0x0,0x38,0xe3,0xf8,0xe3,0x80,0x0,
0x0,0x0,0x3c,0xf1,0xf1,0xe3,0x80,0x0,
0x0,0x6,0x1c,0x70,0x1,0xc7,0x80,0x0,
0x0,0xe,0x1c,0x78,0x3,0xc7,0x80,0x0,
0x0,0xf,0x1c,0x3e,0x7,0x87,0x0,0x0,
0x0,0xf,0x1e,0x3f,0xff,0x8f,0x0,0x0,
0x0,0xf,0x1e,0x1f,0xff,0x1f,0x0,0x0,
0x0,0xf,0xf,0x7,0xfc,0x3e,0x0,0x0,
0x0,0x7,0x87,0x80,0x0,0x7c,0x0,0x0,
0x0,0x7,0x87,0xe0,0x0,0xfc,0x0,0x0,
0x0,0x3,0xc3,0xf8,0x7,0xf8,0x0,0x0,
0x0,0x3,0xe1,0xff,0xff,0xe1,0x0,0x0,
0x0,0x1,0xe0,0x7f,0xff,0x83,0x0,0x0,
0x0,0x1,0xf8,0xf,0xfe,0x7,0x0,0x0,
0x0,0x0,0xfc,0x0,0x0,0xe,0x0,0x0,
0x0,0x0,0x3f,0x0,0x0,0x3c,0x0,0x0,
0x0,0x0,0x1f,0xe0,0x1,0xf8,0x0,0x0,
0x0,0x0,0x7,0xff,0xff,0xf0,0x0,0x0,
0x0,0x0,0x1,0xff,0xff,0xc0,0x0,0x0,
0x0,0x0,0x0,0x1f,0xfc,0x0,0x0,0x0,
0x0,0x0,0x0,0x0,0x0,0x0,0x0,0x0,
0x0,0x0,0x0,0x0,0x0,0x0,0x0,0x0,
0x0,0x0,0x0,0x0,0x0,0x0,0x0,0x0
};
TFT_ILI9163C display = TFT_ILI9163C(__CS,8, __DC);
SoftwareSerial mySerial(2, 3);
Adafruit_Fingerprint finger = Adafruit_Fingerprint(&mySerial);
int fingerprintID = 0;
void setup(void) {
startFingerprintSensor();
display.begin();
displayLockScreen();
}
void loop() {
fingerprintID = getFingerprintID();
delay(50);
if(fingerprintID == 1)
{
display.drawBitmap(30,35,icon,60,60,GREEN);
delay(2000);
displayUnlockedScreen();
displayIoanna();
delay(5000);
display.fillScreen(BLACK);
displayLockScreen();
}
if(fingerprintID == 2)
{
display.drawBitmap(30,35,icon,60,60,GREEN);
delay(2000);
displayUnlockedScreen();
displayNick();
delay(5000);
display.fillScreen(BLACK);
displayLockScreen();
}
}
void displayUnlockedScreen()
{
display.fillScreen(BLACK);
display.drawRect(0,0,128,128,WHITE);
display.setCursor(18,10);
display.setTextColor(GREEN);
display.setTextSize(2);
display.print(“UNLOCKED”);
display.setCursor(20,50);
display.setTextColor(WHITE);
display.setTextSize(2);
display.print(“WELCOME”);
}
void displayNick()
{
display.setCursor(35,75);
display.setTextColor(WHITE);
display.setTextSize(2);
display.print(“NICK!”);
}
void displayIoanna()
{
display.setCursor(25,75);
display.setTextColor(WHITE);
display.setTextSize(2);
display.print(“IOANNA!”);
}
void displayLockScreen()
{
display.drawRect(0,0,128,128,WHITE);
display.setCursor(30,10);
display.setTextColor(RED);
display.setTextSize(2);
display.print(“LOCKED”);
display.setCursor(10,100);
display.setTextColor(WHITE);
display.setTextSize(1);
display.print(“Waiting for valid \n fingerprint.”);
display.drawBitmap(30,35,icon,60,60,WHITE);
}
void startFingerprintSensor()
{
Serial.begin(9600);
finger.begin(57600);
if (finger.verifyPassword()) {
Serial.println(“Found fingerprint sensor!”);
} else {
Serial.println(“Did not find fingerprint sensor”);
}
Serial.println(“Waiting for valid finger…”);
}
int getFingerprintID() {
uint8_t p = finger.getImage();
if (p != FINGERPRINT_OK) return -1;
p = finger.image2Tz();
if (p != FINGERPRINT_OK) return -1;
p = finger.fingerFastSearch();
if (p != FINGERPRINT_OK) return -1;
// found a match!
Serial.print(“Found ID #”); Serial.print(finger.fingerID);
Serial.print(” with confidence of “); Serial.println(finger.confidence);
return finger.fingerID;
}
Advantages and Disadvantages
The advantages of biometrics include the following.
- Assurance and security are high.
- Fast & convenient user experience.
- Authentication is quicker.
- A security system can be improved.
- Flexible & scalability.
- Data accuracy is authentic & reliable.
- It increases convenience.
- Cannot be stolen easily.
- This is a reliable technology.
- It is very easy to use because it does not need to memorize PIN codes or passwords anymore.
- It is very helpful in identifying criminals, and so used for door locks, credit cards, airport security, ATM, database access, border controls, etc.
The disadvantages of biometrics include the following.
- There is a chance of scams by presenting fake image models to sensor devices which need to care for keeping away from such incidence.
Proper training is a must for vendors to know the biometric process very precisely. - These are expensive.
- False rates are higher.
- In less light conditions, facial recognition does not function well.
- Voice detection is not feasible in settings where the operator must stay silent.
- Physical traits cannot be changed.
- Scanner problems can occur.
- Remote access is not possible.
- Malfunction of software.
Applications of Biometric Sensor
The applications of the biometric sensor include the following.
- These are used in different commercial applications like ATMs, electronic data security, computer login, mobile phones, credit cards, internet access, etc.
- These sensors are used in different Government applications like passports, licenses of drivers, ID cards, etc.
- These are used in forensic & law enforcement applications like identification of corpses, culprits, determination of parenthood, etc.
- Biometric sensors are used in different sectors like airports, banking, schools, blood banks, public transport, accessing buildings, lifts, home assistants, access & authentication of mobile, etc.
know more about Ultrasonic Sensor, Nodal Analysis.
Please refer to this link to know more about Nodal Analysis MCQs, Smart Sensor MCQs.
Thus, this is all about an overview of biometric sensor – types, and working with applications. Here is a question for you, what is a TFT display?