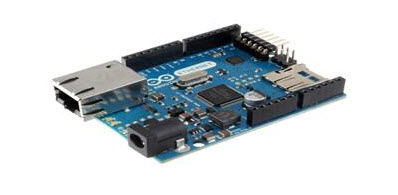
Arduino Board
An Arduino board is a one type of microcontroller based kit. The first Arduino technology was developed in the year 2005 by David Cuartielles and Massimo Banzi. The designers thought to provide easy and low cost board for students, hobbyists and professionals to build devices. Arduino board can be purchased from the seller or directly we can make at home using various basic components. The best examples of Arduino for beginners and hobbyists includes motor detectors and thermostats, and simple robots. In the year 2011, Adafruit industries expected that over 3lakhs Arduino boards had been produced. But, 7lakhs boards were in user’s hands in the year 2013. Arduino technology is used in many operating devices like communication or controlling.
Arduino Technology
A typical example of the Arduino board is Arduino Uno.It includes an ATmega328 microcontroller and it has 28-pins
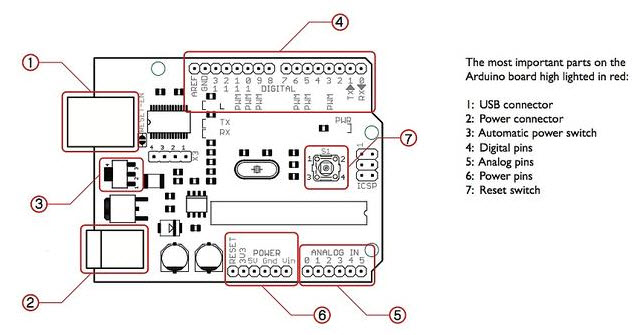
Arduino Pin Diagram
The pin configuration of the Arduino Uno board is shown in the above. It consists of 14-digital i/o pins. Wherein 6 pins are used as pulse width modulation o/ps and 6 analog i/ps, a USB connection, a power jack, a 16MHz crystal oscillator, a reset button, and an ICSP header. Arduino board can be powered either from the personal computer through a USB or external source like a battery or an adaptor. This board can operate with an external supply of 7-12V by giving voltage reference through the IORef pin or through the pin Vin.
Digital I/Ps
It comprises of 14-digital I/O pins, each pin take up and provides 40mA current. Some of the pins have special functions like pins 0 & 1, which acts as a transmitter and receiver respectively. For serial communication, pins-2 & 3 are external interrupts, 3,5,6,9,11 pins delivers PWM o/p and pin-13 is used to connect LED.
Analog i/ps: It has 6-analog I/O pins, each pin provide a 10 bits resolution.
Aref: This pin gives a reference to the analog i/ps.
Reset: When the pin is low, then it resets the microcontroller.
Arduino Architecture
Basically, the processor of the Arduino board uses the Harvard architecture where the program code and program data have separate memory. It consists of two memories such as program memory and data memory. Wherein the data is stored in data memory and the code is stored in the flash program memory. The Atmega328 microcontroller has 32kb of flash memory, 2kb of SRAM 1kb of EPROM and operates with a 16MHz clock speed.
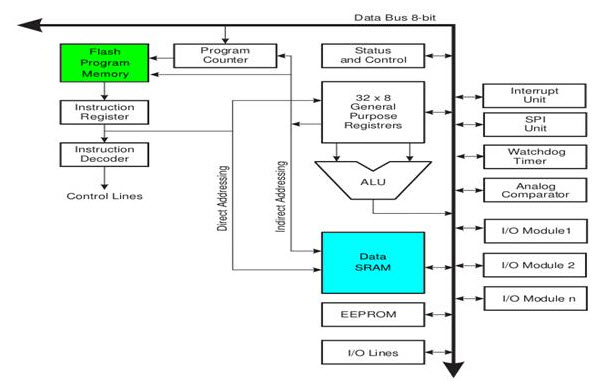
Arduino Architecture
How to program an Arduino?
The main advantage of the Arduino technology is, you can directly load the programs into the device without the need of a hardware programmer to burn the program. This is done because of the presence of the 0.5KB of boot loader, that allows the program to be dumped into the circuit. The Arduino tool window contains a toolbar with a various buttons like new, open, verify, upload and serial monitor. And additionally it comprises of a text editor (employed to write the code), a message space (displays the feedback) like showing the errors, the text console, that displays the o/p & a series of menus just like the file, tool menu & edit.
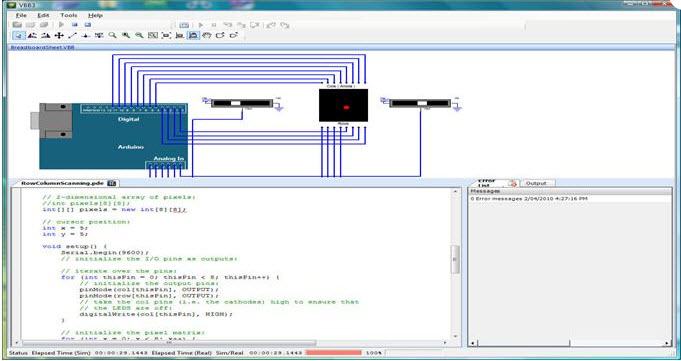
Arduino Program
- Programming into the Arduino board is called as sketches. Each sketch contains of three parts such as Variables Declaration, Initialization and Control code. Where, Initialization is written in the setup function and Control code is written in the loop function.
- The sketch is saved with .ino and any operation like opening a sketch, verifying and saving can be done using the tool menu.
- The sketch must be stored in the sketchbook directory.
- Select the suitable board from the serial port numbers and tools menu.
- Select the tools menu and click on the upload button, then the boot loader uploads the code on the microcontroller.
Basic Functions of Arduino Technology
- Digital read pin reads the digital value of the given pin.
- Digital write pin is used to write the digital value of the given pin.
- Pin mode pin is used to set the pin to I/O mode.
- Analog read pin reads and returns the value.
- Analog write pin writes the value of the pin.
- Serial. Begins pin sets the beginning of serial communication by setting the rate of bit.
Please refer to this link for Arduino MCQs
Advantages of Arduino Technology
- It is cheap
- It comes with an open supply hardware feature that permits users to develop their own kit
- The software of the Arduino is well-suited with all kinds of in operation systems like Linux, Windows, and Macintosh, etc.
- It also comes with open supply software system feature that permits tough software system developers to use the Arduino code to merge with the prevailing programing language libraries and may be extended and changed.
- For beginners, it is very simple to use.
Applications of Arduino Technology
The Obstacle Avoidance Robot Operated with Arduino
The main concept of this project is to design a robot using ultrasonic sensors to avoid the obstacle. A robot is a machine and it is a combination of programs instructions and motors. It can perform some task with some guidance or automatically. This robotic vehicle has an intelligence which is built inside of the robot. When a obstacle problem comes ahead of it then, it guides itself. This robot is designed with a microcontroller from Atmel family of Aduino board.
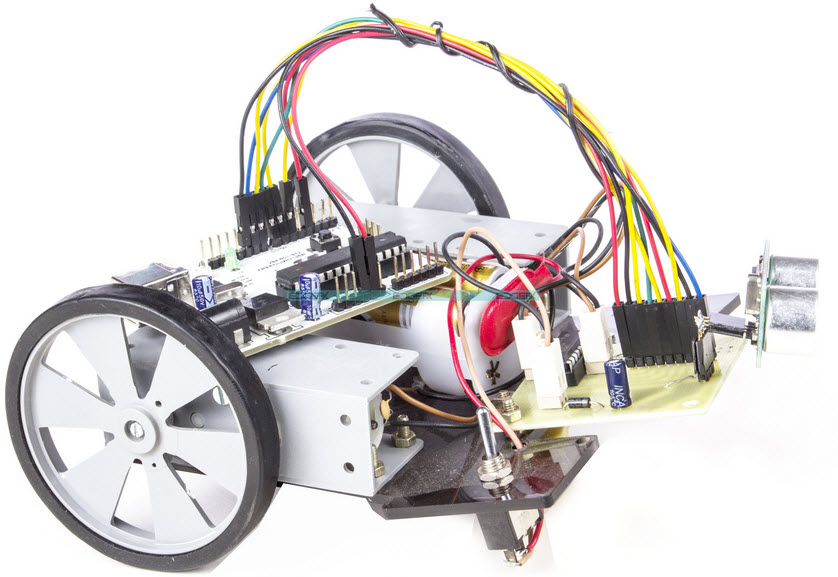
Arduino Operated Obstacle Avoidance Robot Project
Arduino based Controlling of Electrical Appliances using IR
The main goal of this project is to control the electrical appliances using an IR remote. This project uses the TV remote to transmit the coded data, then it is received by a sensor which is interfaced to the control unit. The proposed system controls the electrical loads depending on the transmitted data from the remote. Operating electrical appliances are very difficult for handicapped or senior people. This project gives the solution by integrating household appliances to a control unit which can be operated with a TV remote.
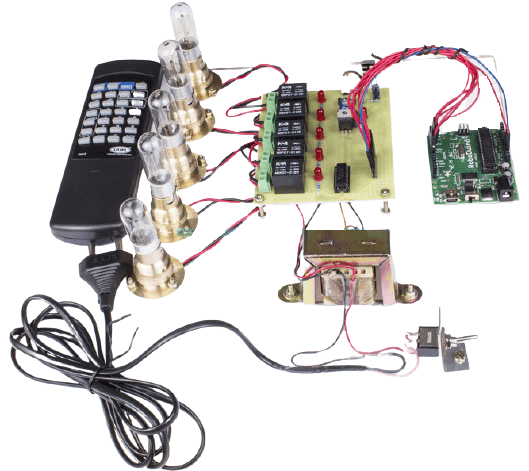
Arduino based Electrical Appliances Control using IR Project
Know more about Arduino MCQs.
Arduino based Home Automation
The main goal of this project is to design a home automation system using an Arduino board with Bluetooth being controlled remotely by any Android OS based smart phone. This home automation system provides a modern solution with smart phones.In order to achieve this, a Bluetooth device is attached to the Arduino board at the receiver side and while on the transmitter side, a GUI application on the smart phone sends ON/OFF commands to the receiver where loads are connected. By touching the particular location on the graphical user interface (GUI), the different loads can be remotely turned ON/OFF via this technology. When we touch the exact location on the GUI, then the loads can be turned ON/OFF remotely. The loads works with an Arduino board through Thyristors and Opto-Isolators using triacs.
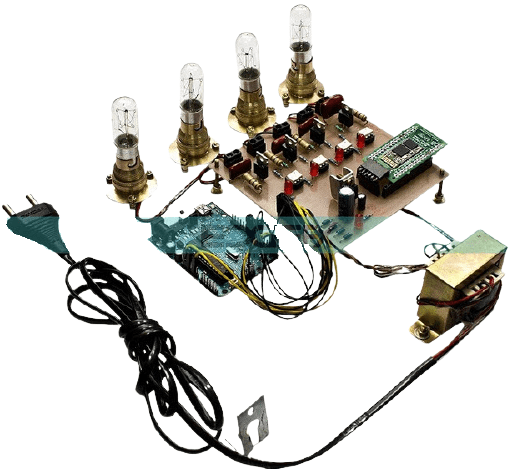
Arduino based Home Automation Project
Underground Cable Fault Recognition using the Arduino Board
The main concept of this project is to find the location of the underground cable fault from the base station in kms using an Arduino technology. The underground cable fault is a common problem in many urban areas. When a fault occurs in the underground cable, at that time the repairing of that cable is very difficult due to not knowing the location of the cable.
Please refer to this link to know more about Arduino Projects for Engineering Students
This project is built with a set of resistors to represent the cable length in kilometers and fault creation is designed with a set of switches at every known kilometer to cross check the exactness of the same. When a fault occurs at a particular distance and the particular phase is displayed on an LCD which is interfaced to the Arduino board.
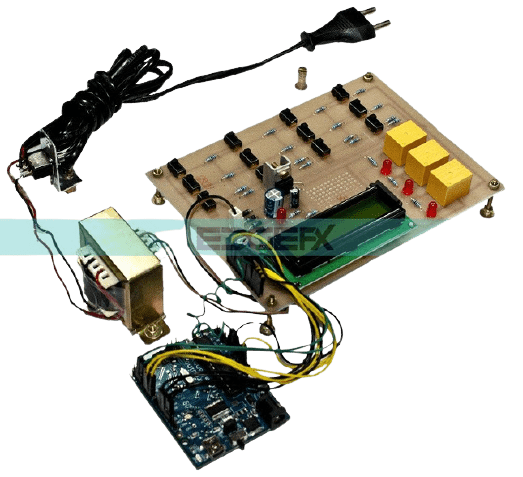
Arduino based Underground Cable Fault Detection Project
This is all about Arduino technology and its applications. So this is the basic information regarding Arduino which can be used for many applications like controlling of actuators for example generators, motors & based on the input of the sensors. Moreover, any questions regarding this topic or electrical and electronic projects, please give your feedback by commenting in the comment section below. Here is a question for you, What is the physical location of the U1A symbol on Arduino Uno?